Table of Contents
Text
<<Back to OSDM Feature Notes - Media | Feature Notes Home | Forward to OSDM Feature Notes - 3D >>
Scroll Text
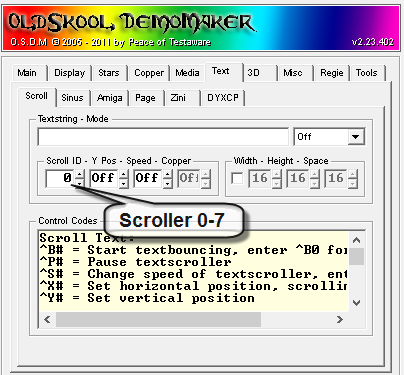
8 Different Scroll Texts, ID 1 - 8
For each of the 8 scroll text can be specified separately the following properties:
- Scroll Speed: Off - 10
- Y-Pos: NUM
- Font Modes
- 0 = Off
- 1 = Font 8
- 2 = Font 16
- 3 = Font 32
- 4 = Copper H 8
- 5 = Copper H 16
- 6 = Copper H 32
- 7 = Copper V 8
- 8 = Copper V 16
- 9 = Copper V 32v
if 4-9 is selected: Copper; Copper Speed: Off - 32
Note: Because of a bug in the current version of OSDM, Scroll text will not be displayed on every machine, if they exceed the following lengths:
- 08 pixels Font: 512 Characters
- 16 pixels Font: 256 Characters
- 32 pixels Font: 128 Characters
- Width, Height and Space - allows the manual stretching or smashing of the selected font, to change a 16x16 font to 20x30 for example.
Control Codes
Control Codes for the use in Scroll Text
Control Scroll Text:
- ^B# = Start textbouncing, enter ^B0 for stop
- ^P# = Pause textscroller
- ^S# = Change speed of textscroller, enter ^S0 for stop
- ^X# = Set horizontal position, scrolling will stop
- ^Y# = Set vertical position
To Control Sinus Text:
- ^T# = Change speed of sinus 16 scroller, ^T0 for stop
- ^Z# = Change speed of sinus 32 scroller, ^Z0 for stop
To Control Logo:
- ^L# = Change logo FX use ^L1 upto ^L;
- ^K# = To fade logo in use ^K1 or to fade out ^K0
- ^H# = Swing logo horizontal, ^H0 will stop
- ^V# = Swing logo vertical, ^V0 will stop
To Control Equalizer:
- ^W# = Change style of equalizer use ^W0 upto ^W5
To Control Regie (Direction):
- ^R$# = Effect on #=1 or off #=0, set $ to A upto X
Special:
- ^F# = Enter ^F1 to fade screen in, ^F0 to fade out
- ^Q1 = Exit demo!
Set # to 0-9 or use ASCII-Char eg. A%?>. or else
Use * for random values eg. ^B*, ^L*, ^W*. or else
Sinus Text

2 Sinus Scroll Texts are available, one for a 16Î16 pixels font and the other for a 32Î32 pixels font. For both scrollers exists the same set of parameters that can be set and tweaked.
Sinus Text Settings
- Scroll Text: The Text for the scroll text. It allows very long texts and does not seem to have the same limitations like the other text effects. There is probably a limit somewhere, but it must be very high. I had already scroll texts with 1,400+ characters for the 32Î32 sinus text and over 3,500 characters for the 16Î16 sinus text.
- High: OFF - 150, the top amplitude (height/peak) of the sinus
- Frequency: OFF - 16, the number of visible "waves" or the distance between 2 wave peeks.
- Speed: 1 - 16 - The speed with which the text is scrolled
- Vertical Position; Center: On/Off - Automatically renders the scroller in the middle of the screen (Y-Axis)
- Y-Pos: OFF - 600 - The Y-Position of the Scroller on the screen, if "CENTER" was not checked
- Copper: OFF - 8 - Speed of the Cooper Effect (if not OFF). The Copper effect applied to a sinus text is always a horizontal one. The Copper effect images for both sinus scrollers (each individually) is specified under "Copper\Copper Medias". ("Copper Text/Sinus 16" and "Copper Text/Sinus 32"). The font color where the copperbar is applied to is WHITE or RGB: 255, 255, 255
Scroll Text Controls
The Speed of a Sinus Scroller can also be adjusted while a demo is running by control codes in "Scroll Texts" and of course via OSDM Script.
Amiga Text
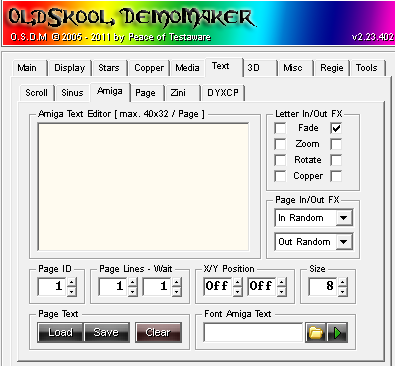
Amiga Text Effects
0 = Direct 1 | |
1 = Mixed | 
|
2 = PopUp 1 | 
Fade & Zoom On
|
3 = Type 1 | 
Fade On
|
4 = Line 1 | 
Fade On
|
5 = Spread A | 
|
6 = Spread B | 
|
7 = Circle Out | 
|
8 = Vertical | 
|
9 = Horizontal | 
|
10 = Left In | 
|
11 = Right In | 
|
12 = Up in | 
|
13 = Down In | 
|
14 = Left Right | 
|
15 = Up Down | 
|
16 = Traffic | 
|
17 = Random - Uses one of the available 16 fade effects at random. This means that for each page probably a different page fade-in effect will be used. | |
1 Fade-In effect only makes sense if either "FADE", "ZOOM" or both are checked in the additional effects settings
Additional Effects (Check Boxes)
- Fade
- Zoom
- Rotate
- Shadow
- Copper
Additional Settings
Special Setting: Flexible Size
Extra Font Media definition for Amiga Text (not using 8Î8, 16Î16 or 32Î32 media. Any of the 3 sizes can be loaded and then via settings zoomed or shrunk. E.g a 32Î32 pixels font can be configured, but the display size of the font might be set to 24 pixels.
The text effects are only for the "Text-In" part and not for the "Text-Out". The text is simply cleared from the screen before the new page is rendered using the specified "text-in" effect(s). X/Y Pos Coordinates for the top left start position of the page text
Page Lines: Number of Lines per Page (1-16)
Wait Time (Display Time of Text Page): 1-128
Notes:
- Page Text Limited to 20Î16 Characters and xx pages. The thinking is the following: typical resolution 640Î480, typical used font 32Î32, 20Î32 = 640 and 16Î32 = 480. Rule of thumb.. no more than 99 lines altogether. Peace mentioned something about max. 7 pages with 320 characters per page = 20.480 charcters limit
- Don't use @ character
- No Special characters (watch when copy and paste)
- Create as many lines per page as specified via "Page Lines" use line-breaks and a space for empty lines
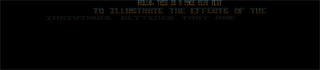
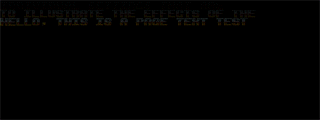
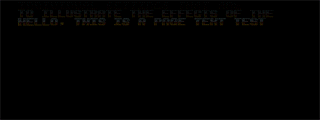
Page Text
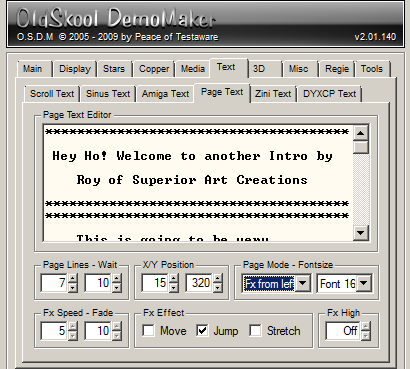
- Page Lines: 1-16 - Number of lines per page. Unlike the Amiga Text, where you have individual pages to go through and edit, for the Page Text, all content is edited in a single Window. So you need to make sure that you don't mess up the pages and keep track of the line-count. For example: If you setup Page Lines to be 8, lines 1-8 would be page 1, lines 9-16 would be page 2 etc. The Page Lines Setting is irrelevant, if FX Scroll Up or FX Scroll Down effects are selected, because they show automatically as many lines as fit, based on Y-Position and FX-High.
- Wait: Off - 10 - Delay until the next "page" is loaded. Setting is irrelevant, if FX Scroll Up or FX Scroll Down effects are selected, because they show automatically as many lines as fit, based on Y-Position and FX-High.
- Position
X = Off - Screen Width
Y = Off - Screen Height
- Font Sizes
- 8 pixels
- 16 pixels
- 32 pixels
Page Modes
0 - Type to right - Typing the text from left to right, line by line. The text is automatically left justified based on the specified X-Coordinate. |  |
1 - Type to center - Typing the text from the center out to the left and right. The text is automatically centered based on the specified X - Coordinate. Make sure that you set the X position high enough that the text will fit on the page. If the text width over all is taking the whole screen, then you must set the X coordinate to half the screen size, e.g. 320 for a screen resolution of 640Î480 pixels. |  |
2 - Type to left - Pushing the text out from the right to the left. The text is automatically right justified based on the specified X - Coordinate. Like the "type to center" effect, setting the X position high enough is essential. If the text takes the whole screen width, the X - coordinate should be the same as the width of the screen resolution, e.g. 640 for a screen resolution of 640Î480 pixels. |  |
3 - Direct to right - Instead of typed, the text of a page appears all at once. The text is automatically left justified based on the specified X-Coordinate. |  |
4 - Direct to center - Page text appears all at once and is automatically centered based on the specified X-Coordinate. As for the "Type to Center" effect, make sure that you set the X-Coordinate high enough that the page will fit. |  |
5 - Direct to left - Page text appears all at once and is automatically right justified based on the specified X-Coordinate. As for the "Type to Left" effect, make sure that you set the X-Coordinate high enough. |  |
6 - FX Fade 1 |


|

|
7 - FX from left 1 |


|


|
8 - FX from right 1 |


|


|
9 - FX scroll up 1 |


|


|
10 - FX scroll down 1 |

|

|
11 - FX zoom 1 -Equivalent to "Stretch" Effect. Meaning that you get the same results if you have no Effect enabled or just "Stretch". |

|


|
1 For ALL FX-Modes there are 4 Images: 1st = No Additional FX, 2nd = Move Only, 3rd = Jump Only, 4th = Stretch Only
Additional Settings
- FX Speed: 1 - 32 - Controls the speed of the enabled FX Effects: Move, Jump and Stretch
- Fade: 1-10
- FX Effects (Checkboxes, None, Any or All)
- FX High: Off - 600
Zini Text
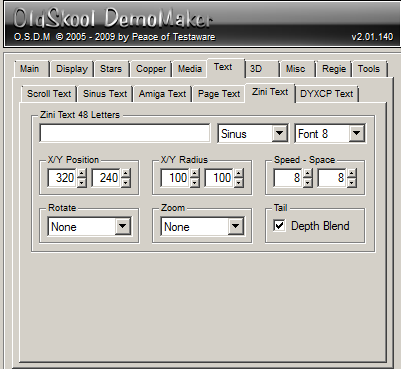
(under construction)
DYXCP Text
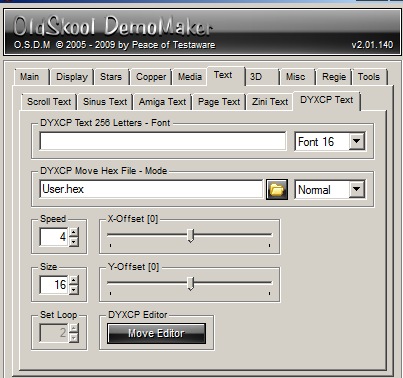
(under construction)
DYCP stands for Different Yielding Character Position. The X in the middle was just added for "fancyness". The term is a creation by OSDM and not used anywhere else.
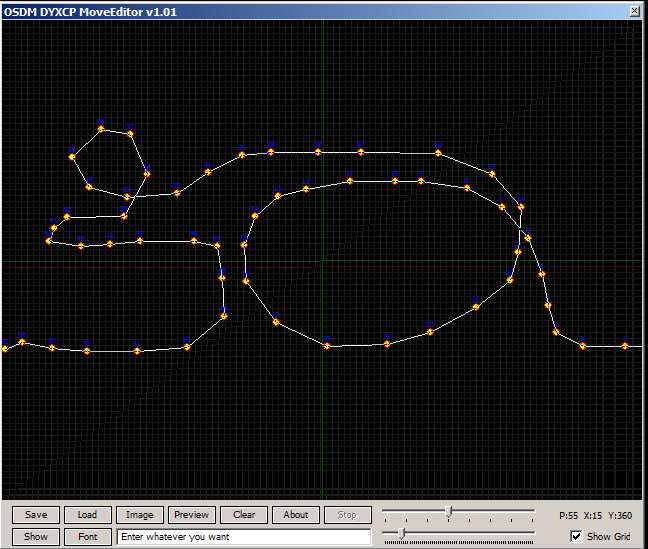
DYXCP Editor
<<Back to OSDM Feature Notes - Media | Feature Notes Home | Forward to OSDM Feature Notes - 3D >>
|