|
BLOCKTRONICS ANSi TUTORIAL | Oct.23.2013 | enzO/BT
TUTORIAL LEVEL: Beginner
Download the Original Article in ANSI Format
INTRODUCTION
In is tutorial you will learn some basic techniques to draw smallscale ANSi artwork, but at can be applied to any kind of textmode drawing.
TOOL USED: PabloDraw
You can use any o er ANSi editor or download PabloDraw here: http://picoe.ca/products/pablodraw/
Are you ready? Let's draw! :)
enzO (enzo@blocktronics.org)
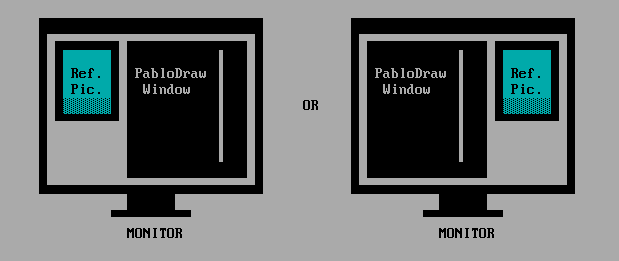
01. Google a good reference picture for your drawing. It can be a photo or illustration. In this case, I've used this one: bit.ly/1gJMP14. Resize PabloDraw window and place the picture side by side with it.
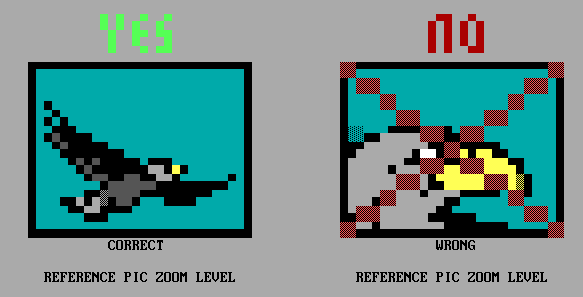
02. Adjust the zoom level on the reference to make it the same size you will draw it, in this case, a smallscale. This way you can focus only on the necessary details for that specific size.
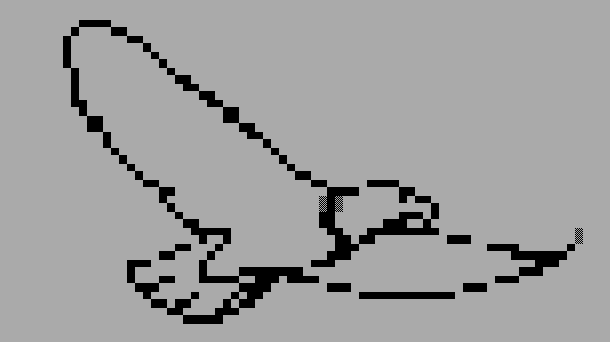
03. Here's the most important step of this tutorial: Start your drawing trying to replicate the overall shape of the picture. Don't get stuck on details, it will only slow you down. Only PRO artists can start with details and coloring, if you are not a PRO yet, do your homework and make the overall shape look as accurate as possible before doing anything else.
Hint: Never delete an outline you dislike. Just move it elsewhere on the canvas before trying something new, or save it. You will be amazed how you may think different about it the next time you load it. New day, new ideas.

04. Now that you're satisfied with the final basic shape, start outlining, the other main parts of the picture. In this case, the head, core and tail. Don't worry about detailing it too much right now, just make sure to outline the main parts as accurate as you did with the overall shape in the previous step.
05. Here's another helpful trick, right now your outlines are pretty close to the final version, but not finished yet. So, start detailing the drawing from the outside to inside. This means you have to make sure the outer outlines of the drawing looks really good before working on inner parts of it.
Hint: Always use negative space to add more depth to your drawing. Remember that you don't have to draw exactly what you see to make the viewers really believe on it. Trick their brains with the smart usage of negative space.

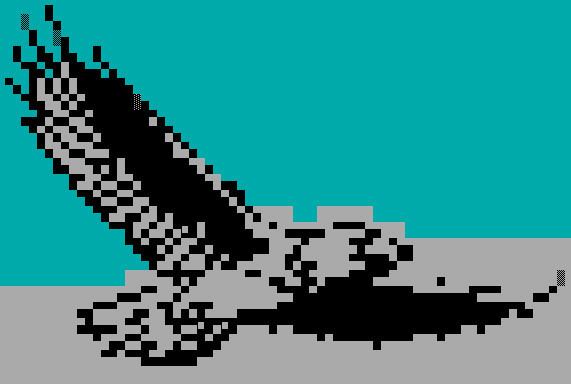
06. Alright! Now it's time to give special attention to details. Think about what's really needed to add, and don't stop until you achieve a satisfying result. Test multiple options for the details, using different blocks until it looks good enough. Test, test and test. There are many ways to get the same result in ANSi, and your job is to find your own way.
As you can see in some details on the head and tail, I like to use some unconnected lines to smooth some lines and I hardly use F7 or F8 blocks, but That's just me.
At this step, it's also a good idea to start testing colors to see if they constrat well with the colors you've planned for the drawing. Once again, you have to test multiple options to find the best result.
Hint: If you face a detail too hard to replicate, adapt it your way. Like I said before, you can trick the viewer's brain in many ways.
07. After you ve decided about the colors, add all the basic colors. Remember that the original reference pic has it's own light source, so if your drawing also replicated the original light source, make sure the outline and colors fit it well.
Hint: Keep testing and refining the outlines and details on every step. There's always room for improvement until it's finished.
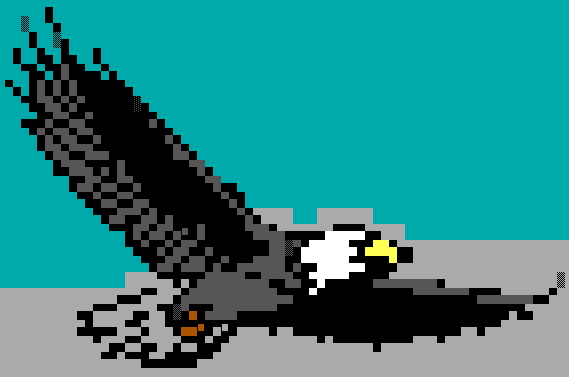
08. You are almost done! Now your outline and base colors are ready to be shaded. If your drawing is really minimalist, you won't be able to apply complex shading techniques, so, just keep it simple to get a better result. Keep testing different options for the shading and colors until you feel proud about it!

Well done! You ve completed this tutorial.
Keep practicing over and over with different pictures, perspectives, angles, themes and styles. That's really the only way to master it. FINAL HINT: Have fun, always! ;)
enzO [Blocktronics] (enzo@blocktronics.org)
Further Resources
|