|
You can download Enzo's original ASCII tutorial file in .ANS format here.
Hello boyz and girlz,
This is enzO and I'm bringing this quick and easy eye tutorial inspired by the awesome "chucky" tutorial by zeroVision of blocktronics.
WARNING!
Before you continue, you must know that there's no "right" way to draw and that you should develop your own style after analyzing other people's work and practing a LOT (i really mean it)!
|
INTRO
I'm gonna show you in 08 simple steps how I start ALL my original ansis:
by drawing the eyes!
Many of the techniques shown here I've learned from Fever's ansis. I don't draw as good as Fever and never will, but I took the time to learn a few tricks he constantly used to draw his amazing characters (you rule, Aaron!).
WHAT YOU WILL LEARN IN THIS TUTORIAL
You will learn how to outline and create a pair of eyes that will enable you to start a male/female ansi character in the frontal look pose.
WHAT YOU WILL NOT LEARN IN THIS TUTORIAL
You will not learn how to shade.
You will not learn how to draw anything, except for the eyes.
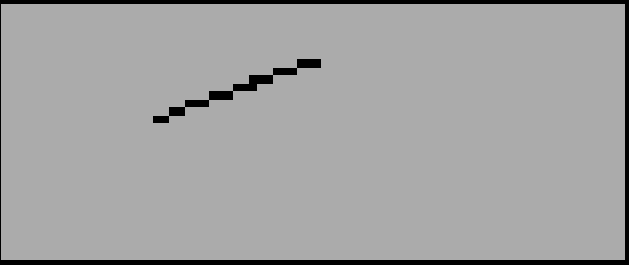
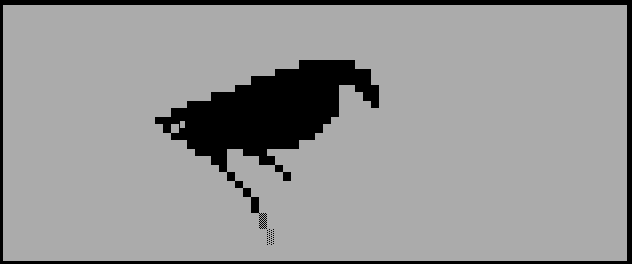
STEP 01
Like I said before, I always start my original ansis drawing the eyes and after that, I expand it to the point I need.
You can start filling a good part of the canvas with solid blocks so you are able to "trace" the lines of your ansis.
Draw a very simple diagonal line to start.
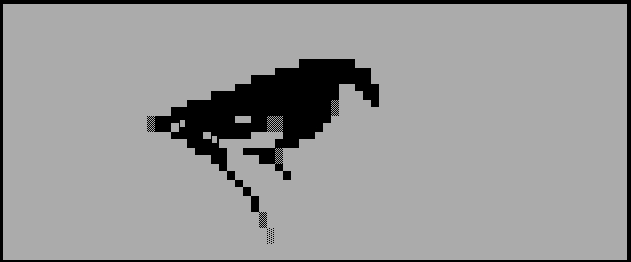
STEP 02
After that, you draw another line starting from the same origin point, but this time, you will give a more "round" effect to it and add a smooth fading at the end of it...pretty easy, right?

STEP 03
Now it's time to give it some proper shape, adding a vertical line to "close" the eye format, then adding another diagional line, but smaller this time, and finally "connecting" all the lines.
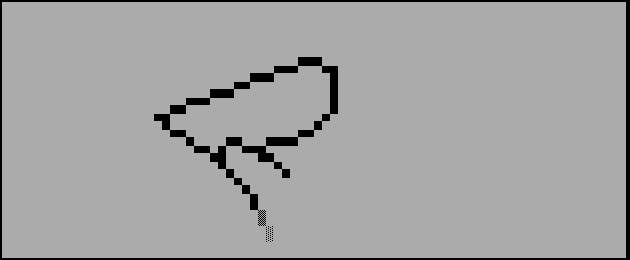
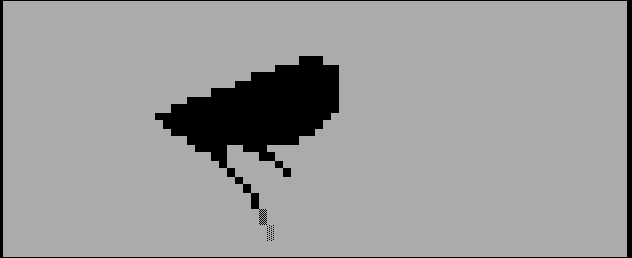
STEP 04
That's great, but it doesn't look like an eye yet! So, clean the inside area of it until you get this empty shape. Easy step, eh?
STEP 05
Ok, it's time to add a bit of detail to it... Add a curve to represent the eyebrow and few blocks at the origin point corner.
STEP 06
At this step, we spice it up replacing some blocks with F2 (hint: F2 looks great everywhere, just ask avg!).
For the eyeball, you can make something very minimalistic to take advantage of the negative space we've created. Don't worry about having the eyeball "glued" to the face, because when you color it, it will look just perfect due to the color contrast.
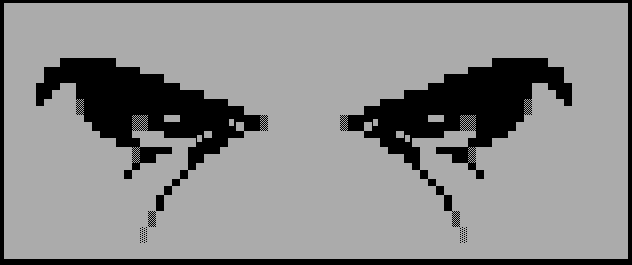
STEP 07
Now, the HARDEST step of this tutorial!
Move the eye to the right side of the canvas, copy it, rotate it horizontaly and paste it on the left side of the canvas until you have a nice pair of eyes just like these.
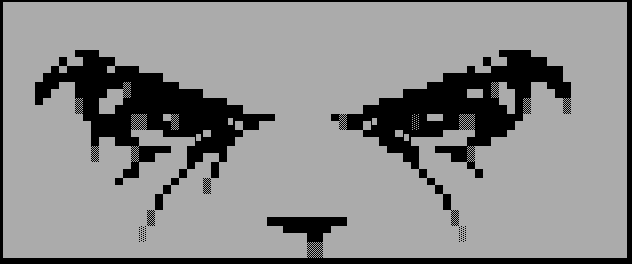
STEP 08
Now, in this final step, which i consider the most important:
We add unique details to each one of the eyes to "break" the mirror effect created by the "cut & paste" action of the previous step.
You can even add a simple nose line that will give a better aspect to it.
As you may know, the symmetry must be avoided in ansi most of the time, because the viewer will just think something with both sides drawn exactly the same is really boring and lacks creativity.
WHERE TO GO FROM HERE
From this point you can start outlining the whole face, head and everything you can come up with, but that's not the objective of this tutorial (maybe the next one?) ;)
Always remember that drawing originals takes twice the time (or even more) and you may have to test a million of different things before reaching the final result.
My final hint is that if you get stuck in some specific area of your ansi, don't waste more time on it, just move to another part that you are more inspired to work and keep drawing...you can always come back later to finish the previous part. This way you save time and draw faster!
July 19th, 2008
tutorial created by enzO
[ Blocktronics ansi squad - "Textmode art the way you like it!" ]
|