
OSDM Demo Tutorial ??? New World Order
OSDM Demo Tutorial ??? New World Order
 Posted on: Saturday, April 17th, 2010 10:17
I wrote a couple months ago a tutorial for the OSDM Wiki for the creation of my Oldskool Demomaker multi-part demo production ???New World Order???. Unfortunately does it appear to be the case that the tutorial was not indexed by search engines like Google yet, so I decided to republish it at my personal blog once more that people will be able to find it, if they are searching for content like this.
Overview
- New World Order??? – Multipart Demo by Roy/SAC Created in January 2010 with the Oldskool Demomaker (OSDM) V2.01.140 by Peace/Testaware
- Watch the Video Capture of the Demo and download the Win32 executable here.
- OSDM Settings File Location: Data\Prefs\Roy – NewWorldOrder-fs.ini
(zip download NWOPrefsIni.zip (6.84 KiB) - Download All Resources, Images, Objects, Ini, Screen Shots, Tutorial in TXT format and Win32 Exe of the Demo in one ZIP archive here NWO TUt.zip NWO (4.9 MB)
The Demo Parts
First a break-down of the individual demo parts and which OSDM effects were used for each of those parts.
1. Roy/SAC is Back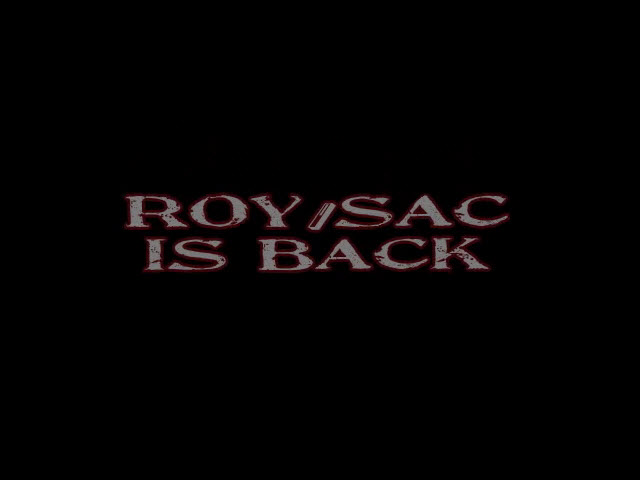 – Bounce Bobs Effect |
2. Roy/SAC Proudly Presents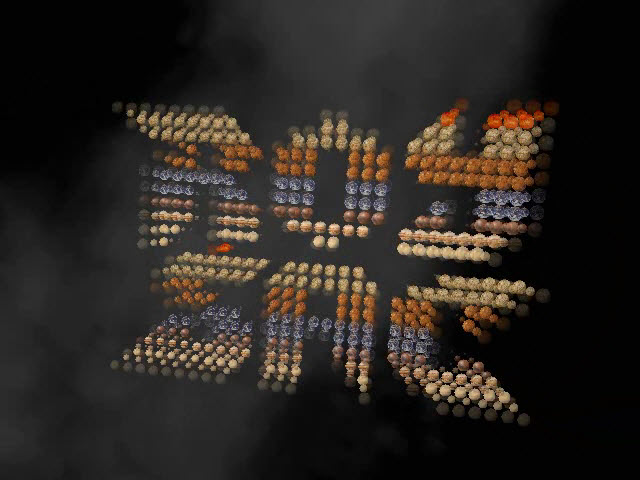 – Sprites Effect – 3D Ball Effect |
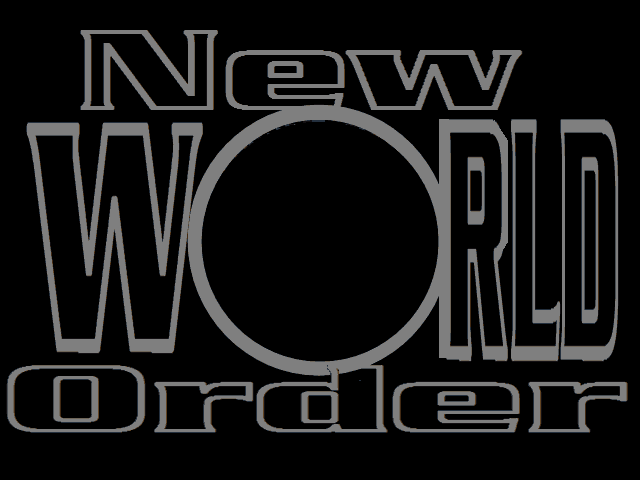
3. NWO Logo Animation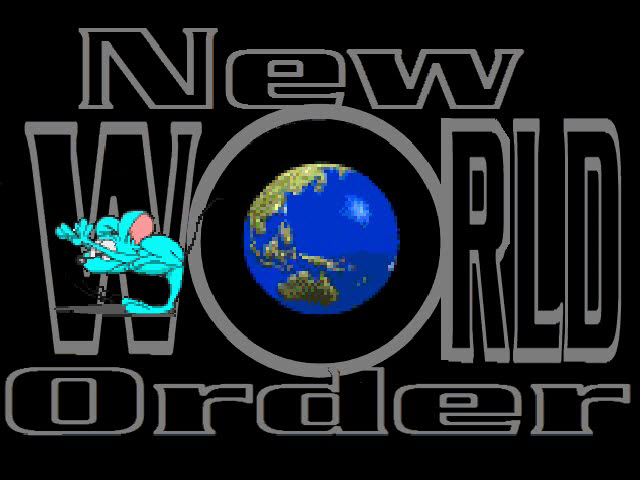 – Sprites Effect |
4. Vector Stars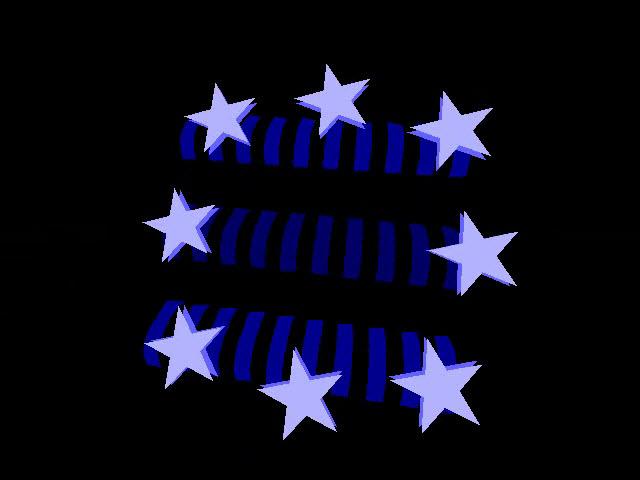 – 3D Vector Effect |
5. Text and Copper Bars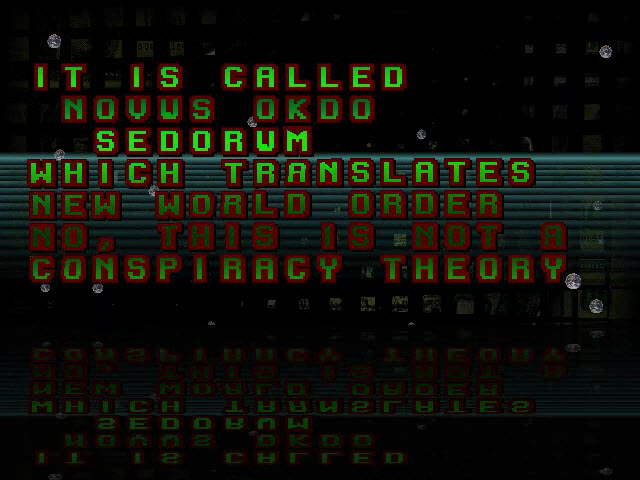 – Mask Effect – Star field Effect – Copper Bars Effect – Amiga Text Effect |
6. 3D Balls Carpet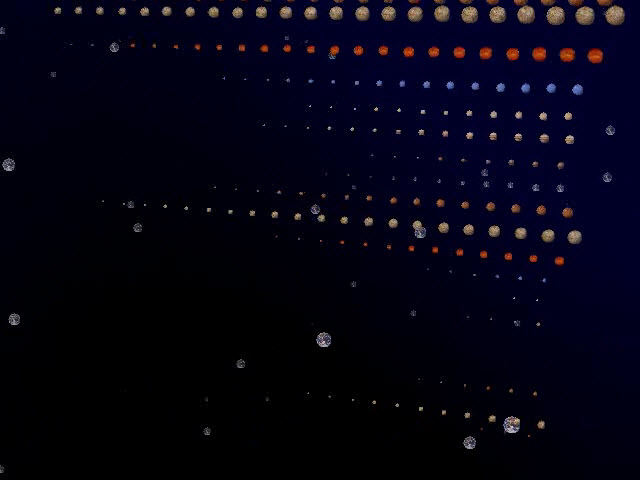 – Plasma Effect – Star field Effect – 3D Ball Effect |
7. Big Scroller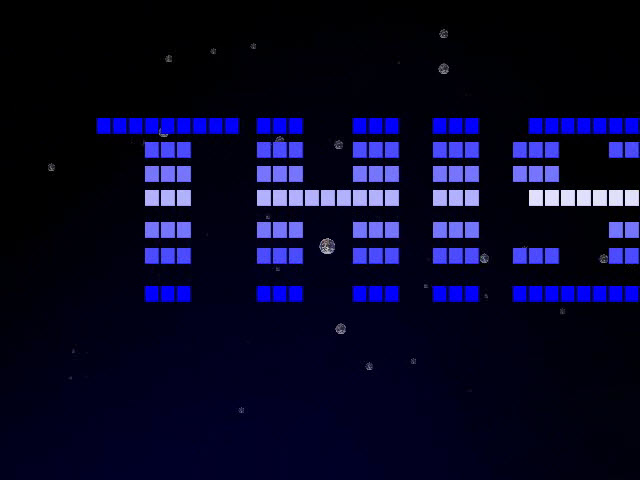 – Plasma Effect – Star field Effect – Scroll Text Effect |
8. Vector Space Ship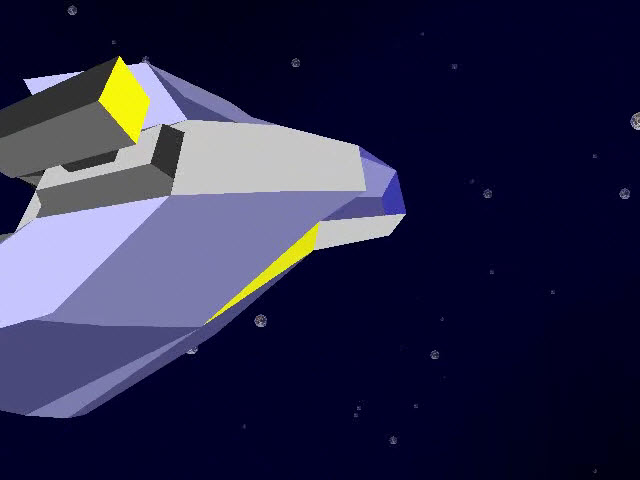 – Plasma Effect – Star field Effect – 3D Vector Effect |
9. Dollar Pyramid Flashing – Mask Effect |
10. Pyramid Parallax Scroll & Text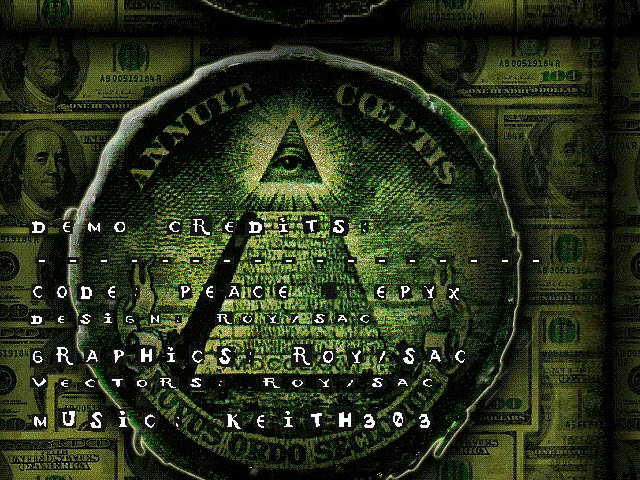 – Mask Effect – Back Effect – Page Text Effect
|
11. Final Part – Star field Effect – Reflection Effect – Logo Effect – Sinus 16 and 32 Effects |
Not really a part: 12) Quit Demo via Scroll Text Control Code and Transitions between many of the demo parts are using the C64 Back effect. See details further down.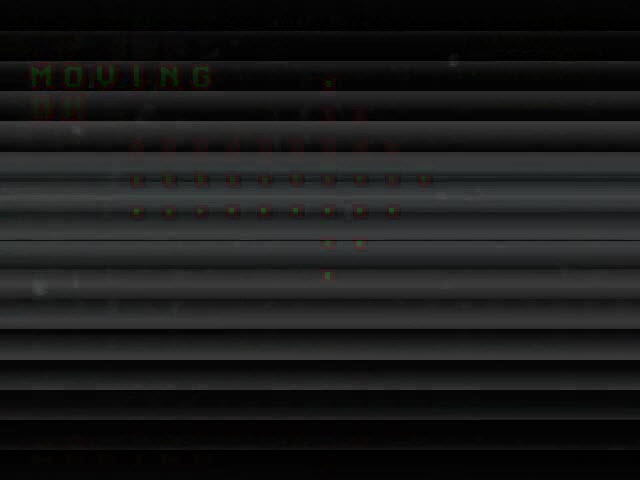 – C64 Back Effect – Scroll Text Effect |
The Settings
I am now going over all Settings Tabs and their configuration in detail. I also added notes to the effects settings where I felt it to be important to explain the ???WHY??? and ???WHAT FOR???.
Main
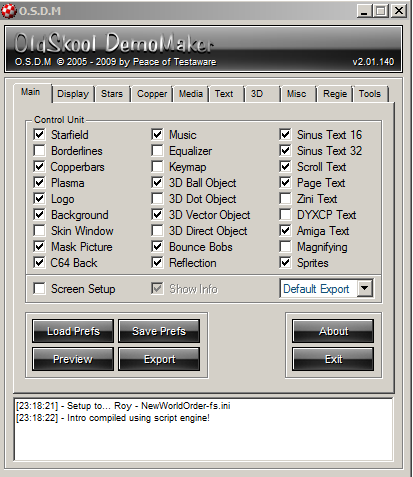 |
Enabled Effects
|
Display
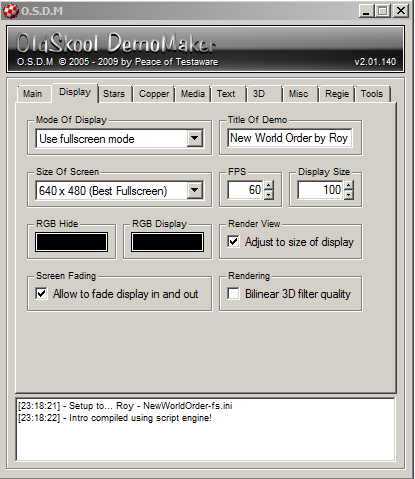 |
|
Stars
 |
|

Stars Effect Notes
- The stars effect is used for the background and mostly just as visual support for the main effect in a whopping 5 parts of the demo
- Part 5) Amiga Text
- Part 6) 3D Ball Carpet
- Part 7) Big Scroll
- Part 8) Vector Space Ship
- Part 11) Final Part
- The settings for the rotation and speed were configured primarily for the Vector Space Ship part, because there the effect plays an integrated part in the scene beyond merely providing visual support.
Copper (FX) and Plasma
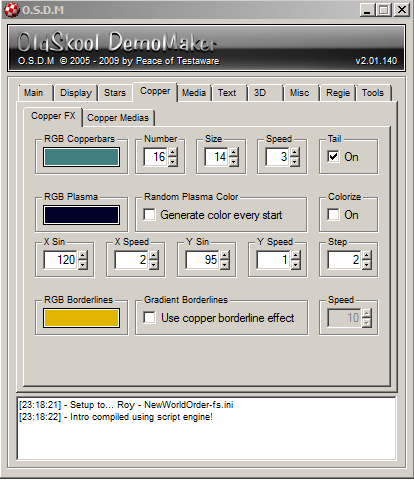  |
Copper bars Effect
Plasma
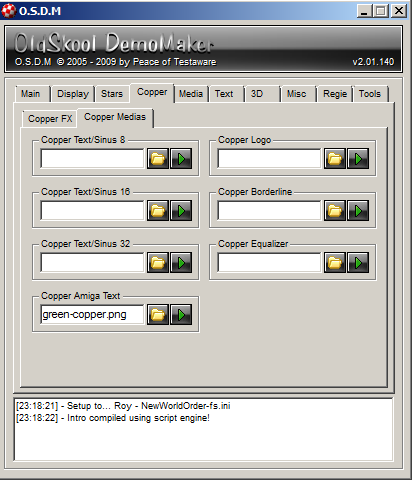
Copper MediaCopper Amiga Text See Amiga Text Settings for Image |
Copper Bars Effect Notes
- The Copper bars are only used as background for the Amiga Text Effect of part 5) of the demo
Plasma Effect Notes
- I like to use the plasma effect to add some visual depth to various scenes. It just looks cooler if you have something going on in the background instead of having just a black screen there. I like blue as a color in general, but it is also a nice fit for the space scenes in this demo. However, the effect is used for visual support in 3 parts of the demo altogether.
- Part 6) 3D Ball Carpet
- Part 7) Big Scroll
- Part 8) Vector Space Ship
Media ??? Logo
 |
File: ???Data\Anim\Vertical\women01b-_V9.jpg??? (click on image for full size version)
|

Logo Effect Notes
- The logo effect is only used for the final part (11) of the demo. I almost did not use it at all, but felt bad about that fact and decided to add a small and short bonus part at the end of the demo as a result of it. I use a Vertical Frame animation as logo, a girl covered in silk throwing back her hair in slow motion. It almost looks like she is underwater, which is the reason why I applied the ???Wave Stretch??? effect to the logo to enhance this notion even further.
Media ??? Background
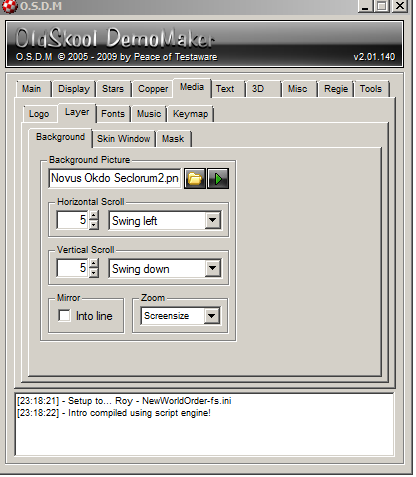 |
File “Data\Layer\Novus Okdo Seclorum2.png” (click on image for full size version)
|
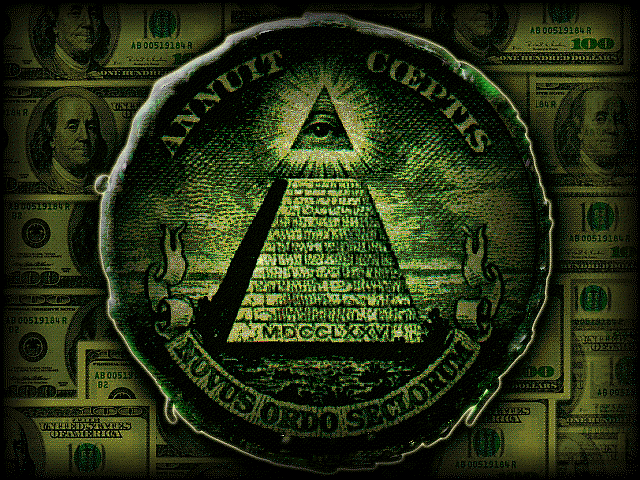
Background Effect Notes
- This effect is only used for part 9) of the demo. The black regions of the image are transparent and make the MASK effect visible. The order in which the effects are rendered is controlled via the ???Storyboard??? feature under the ???Regie??? (Direction) tab of the OSDM interface.
Media ??? Mask
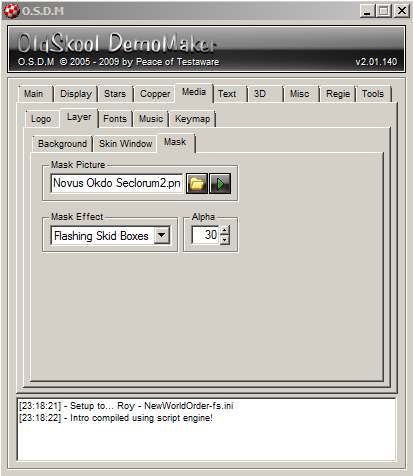 |
File: “Data\Layer\Novus Okdo Seclorum2.png” (Same Image as for Background)
|
Mask Effect Notes
- This nice effect is used in 3 parts of the demo 5) Text and Copper (to enhance the copper background effect), 9) just on its own and 10) as background for the same image used with the BACK image and only visible through the black and thus transparent regions of the BACK image effect.
Fonts
 |
Font 16File “Data\Fonts\16\megafont16-x16.png”
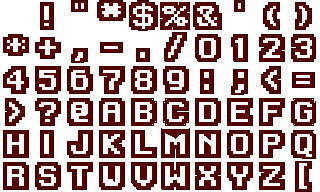
Font 32File:
Amiga TextFile:
|

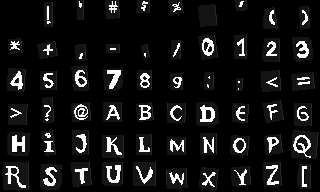
Font 16 Notes
- Used for Big Scroll and Sinus Scroll 16 (Final Part). As you can see, most characters of the font were replaced by graphical elements, which are vital for its use for the two effects in the demo.
??
Font 32 Notes
- Used for the End Scroller in part 10 of the demo (Page Text) and for the short Sinus 32 Scroller in the Final Part (11) of the demo
??
Amiga Text Font Notes
- Only used for the Text Part (5) of the demo with a green copper effect applied to it. See details at the information about the ???Amiga Text??? effect
Music
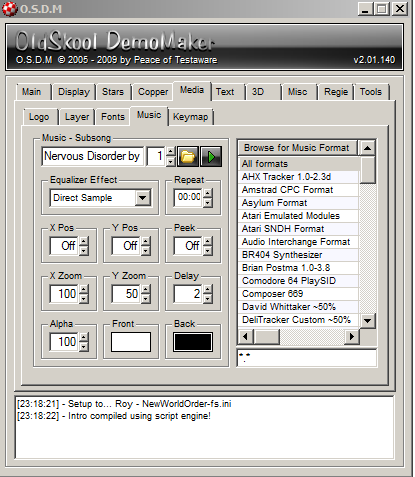 |
File: “Data\Modules\Nervous Disorder by Keith 303 of Radical Rhythms.XM” (NWOmodule.zip (305.41 KB)) |
Music Notes
- I only used a single Fast Tracker 2 (.XM) tune, so there was nothing really to configure for me on this screen (except for selecting the tune itself). I am not using the Equalizer effect nor the multiple tunes packed into an OMA archive features.
Text – Scroll Text
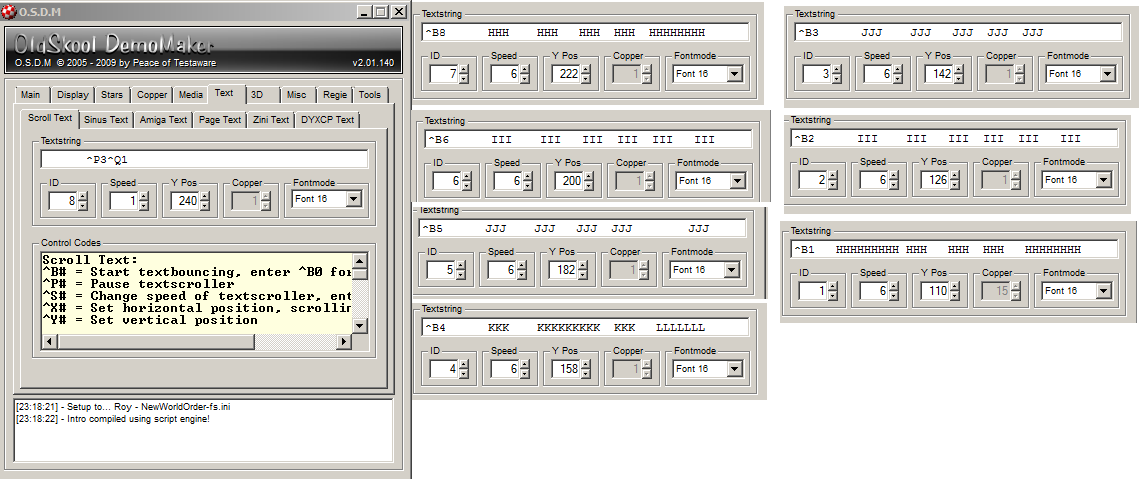
Scroll Text Effect Notes
- ID 1-7 are used for the “Big Scroll” Part
- ID 8 is used to quit the demo at the end. It only contains control codes. ^P3 for a short pause and ^Q1 to trigger the QUIT (and some spaces at the beginning as ???buffer???)
- The Big Scroll uses a special tweaked font where the letters are replaced by graphical elements that make up the scroller, in this case square boxes in blue colors with different shades.
- Each scroller starts with a ^B control code to initiate the ???bounce??? effect. The amount is set to a different value for each scroller to achieve the stretch and swing effect that you can see in the final demo. The ^S0 code at the end of each scroller sets the speed to 0 to avoid that the scroller restarts.
- In Order to prevent the Scroller No 8 with the Script command to be executed while my Big Scroller runs, I set its speed via OSDM Script to 0 prior running the big scroller. I then changed the speed back to ???-5??? at the end of the demo to execute the command. To avoid any accidental execution caused by potential delays between the effect activation and the modification of its speed to stop it, I added a few spaces at the beginning of scroller #8 and also the pause (^P3) prior the quit command.
Note: I removed 52 blanks/space Characters of scroller texts 1 to 7 before the
S0 control command for display/space reasons. I also added line-breaks for the same reasons.
ID: 1 , Speed: 6, Y-Pos: 110, Font Mode: Font 16
^B1 HHHHHHHHH HHH HHH HHH HHHHHHHH HHH HHHHHHHH HHHHHHH
HHH HHH HHHHHHH HHH HHH HHHHHHH HHHHHHH HHH HHHHHHH
HHH HHH HHH ^S0
ID: 2 , Speed: 6, Y-Pos: 126, Font Mode: Font 16
^B2 III III III III III III III III III III III III
III III III III III III III III III III III III III
III III ^S0
ID: 3 , Speed: 6, Y-Pos: 142, Font Mode: Font 16
^B3 JJJ JJJ JJJ JJJ JJJ JJJ JJJ JJJ JJJ JJJ
JJJ JJJ JJJ JJJ JJJ JJJ JJJ JJJ JJJ JJJ JJJ JJJ JJJ
JJJ JJJ ^S0
ID: 4 , Speed: 6, Y-Pos: 158, Font Mode: Font 16
^B4 KKK KKKKKKKKK KKK LLLLLLL KKK LLLLLLL KKK KKK KKK
KKK KKKKKKKK KKK KKK KKK KKK KKKKKKKK KKK KKK KKK KKK
KKK KKK ^S0
ID: 5 , Speed: 6, Y-Pos: 182, Font Mode: Font 16
^B5 JJJ JJJ JJJ JJJ JJJ JJJ JJJ JJJ JJJ JJJ
JJJ JJJ JJJ JJJ J JJJ JJJ JJJ JJJ JJJ JJJ JJJ JJJ JJJ JJJ
JJJ JJJ ^S0
ID: 6 , Speed: 6, Y-Pos: 200, Font Mode: Font 16
^B6 III III III III III III III III III III III
III III III III III III III III III III III III III III
III ^S0
ID: 7 , Speed: 6, Y-Pos: 222, Font Mode: Font 16
^B8 HHH HHH HHH HHH HHHHHHHH HHH HHHHHHHH HHHHHHH
HHHHH HHH HHH HHHH HHHH HHHHHHH HHH HHH HHHHHHHH HHHHHHH
HHH HHH HHH ^S0
ID: 8 , Speed: 1, Y-Pos: 240, Font Mode: Font 16
^P3^Q1
Text – Sinus Text
 |
Sinus 16 Settings
Sinus 32 Settings
|
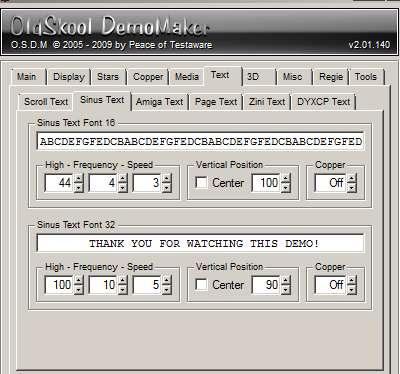
Sinus Text Effect Notes
- Both Sinus Text Scrollers were only used for the final part (11) of the demo
Sinus 16 Text
Note: I added?? line-breaks to the scroll text for display reasons
ABCDEFGFEDCBABCDEFGFEDCBABCDEFGFEDCBABCDEFGFEDCBABCDEFGFEDCB
ABCDEFGFEDCBABCDEFGFEDCBABCDEFGFEDCBABCDEFGFEDCBABCDEFGFEDCB
ABCDEFGFEDCBABCDEFGFEDCBABCDEFGFEDCBABCDEFGFEDCBABCDEFGFEDCB
ABCDEFGFEDCBABCDEFGFEDCBABCDEFGFEDCBABCDEFGFEDCBABCDEFGFEDCB
Sinus Text 16 Effect Notes
- It uses the modified font like the Big scroll but it uses different letters, which were replaced with gray boxes in different shades.
Sinus 32 Text
THANK YOU FOR WATCHING THIS DEMO!
Text – Amiga Text
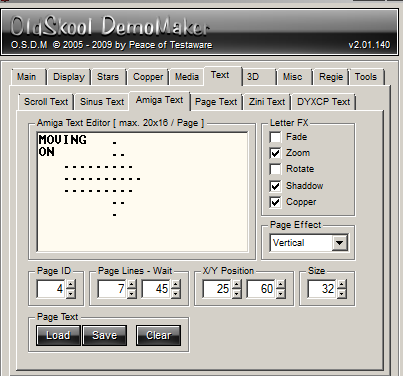  |
Letter FX
|
| Page 1 THIS IS THE LASTEST OSDM DEMO RELEASE BY ROY OF SUPERIOR ART CREATIONS IN THE YEAR 2010 |
Page 2 IT IS CALLED NOVUS OKDO SEDORUM WHICH TRANSLATES NEW WORLD ORDER NO, THIS IS NOT A CONSPIRACY THEORY |
Page 3 I HOPE YOU ENJOY WATCHING THIS DEMO AS MUCH AS I ENJOYED CREATING IT FOR YOU! |
Page 4 MOVING???? . ON???????????? .. ……… ………. ……… .. . |
Text – Page Text
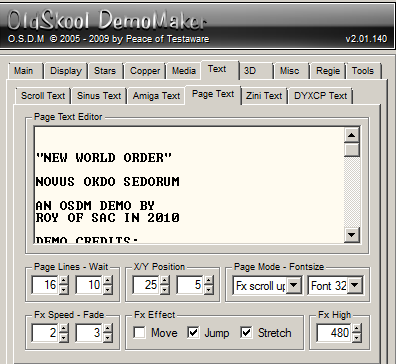 |
Settings
FX Effects
|
| Page Text | (continued 1) | (continued 2) | (continued 3) |
| “NEW WORLD ORDER”
NOVUS OKDO SEDORUM AN OSDM DEMO BY DEMO CREDITS: GREETINGS TO: |
—————– ALL MEMBERS AT FORUM DOT ESPECIALLY TO ALSO GREETINGS TO |
MAD MAX/CPI RAD MAN/ACID BEN GARRET LORD SCARLET JASON SCOTT ALL CURRENT AND CHEERS! |
DO NOT FORGET TO VISIT ROYSAC.COM SIGNING OFF… |
Page Text Effect Notes
- This effect was only used in the End Scroller Part (10) of the demo
3D – 3D Ball
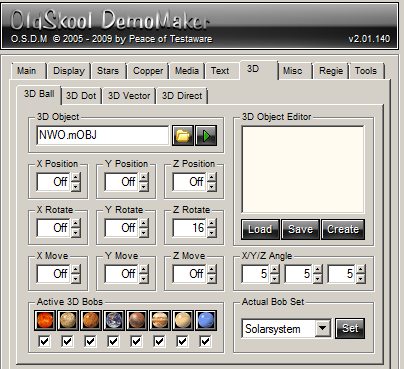
The 3D Ball Images
Uses the “Solarsystem” Bobs Set from OSDM ??? Files:
|
The MOBJ file was created using the “Create Multiple 3D Ball Object” feature under Tools\Utils (Select Tool via the Dropdown in the top right)
File: “Data\Objects\NWO.mOBJ”
Position
Rotation
Angle
|


3D – 3D Vector
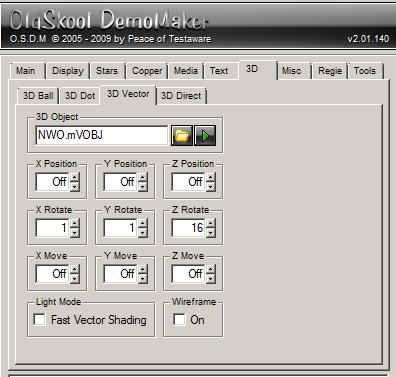 |
Uses also a multi object file, created using the “Create Multiple 3D Vector Object“ feature under Tools\Utils File: “Data\Vectors\NWO.mVOBJ”
Position
Rotation
|
3D Vector Effects Notes
- Due to the lack of control of 3D objects via OSDM Script in the current version of OSDM (Peace is fixing this in the upcoming version of OSDM) is it quite a challenge to use multiple different objects in a single demo, because the rotation settings etc. are all fix and the same for all objects. You can only control the movement of the object on the X and Y axis as well as zoom it on the Z-axis. While the settings worked nicely for the Stars Circle vector object, it was a different story with the spaceship. It just did not look right and changing the current settings would have screwed up the other effect. As a solution for this dilemma I added animation commands to the space ship object. All points are animated on the X, Y and Z coordinates to add some extra movement.
- Also to consider was the fact that once you enable the vector effect, ALL objects within the mVOBJ object definition file start to rotate according to the settings in OSDM. This happens regardless if you selected a particular object via IDN = X. This means that the appearance of an object changes depending on how long you had the effect enabled prior to show other objects. Depending on the object and the rotation settings, this can have dramatic impact on how each of the vector parts are going to look like.
- The same limitations and challenges also apply to the 3D Ball vector objects.
Misc. ??? Sprites
 |
I uses 6 of the available 8 Sprite slots |
1. File: “Data\Anim\Horizontal\Smokeburst-gray_h18.jpg” (click on image for full size version)

- X-Pos: 1, Y-Pos: 1, Alpha: 1, Zoom: 205
- Anim: On, Frames: 18, Delay: 20, Start: 1
- Angle: 285, Rotate: Left, Speed: 2
Sprite 1 Notes
- Used as background effect of the intro part (2) with the 3D Balls Roy/SAC logo
2. File: “Data\Anim\Horizontal\earth05b_H30.png” (click on image for full size version)
![]()
- X-Pos: 100, Y-Pos: 390, Alpha: 1, Zoom: 240
- Anim: On, Frames: 30, Delay: 22, Start: 1
- Angle: Off, Rotate: Off
Sprite 2 Notes
- Used for the Title animation part (3) of the demo
3. File: “Data\Layer\anewproductioncalled.png”

- X-Pos: 320, Y-Pos: 350, Alpha: 1, Zoom: 100
- Anim: Off
- Angle: Off, Rotate: Off
Sprite 3 Notes
- A simple text layer used for the intro sequence (part 2) of the demo. Faded in and out using OSDM Script.
4. File: “Data\Layer\proudlypresents.png”

- X-Pos: 320, Y-Pos: 155, Alpha: 1, Zoom: 100
- Anim: Off
- Angle: Off, Rotate: Off
Sprite 4 Notes
- Another simple text layer faded in and out during the intro sequence (part 2) of the demo
5. File: “Data\Layer\NewWorldOrder.png” (click on image for full size version)
 |
|
Sprite 5 Notes
- Used for the title animation part (3) of the demo. Zoomed and faded via OSDM script.
6. File: “Data\Anim\Horizontal\mou2blackbg_H20.png” (click on image for full size version)
![]()
- X-Pos: 121 , Y-Pos: 240 , Alpha: 1 , Zoom: 200
- Anim: On , Frames: 33 , Delay: 22 , Start: Off
- Angle: Off , Rotate: Off
Sprite 6 Notes
- The funny animation of the mouse that is scared of what it sees to escape with a squish in classic comic style. Used for the title animation part 3 of the demo.
Misc. Bounce Bob
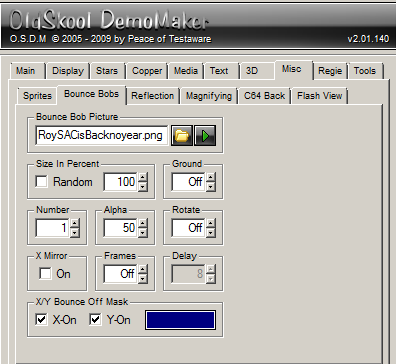 |
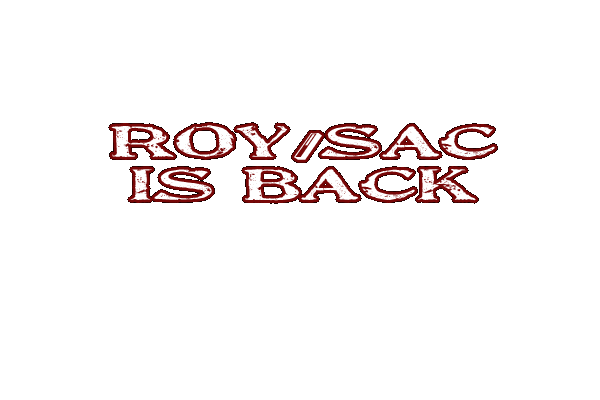
File “Data\Layer\RoySACisBacknoyear.png” (click on image for full size version)
|
Bounce Bobs Effect Notes
- * The Bounce Off settings are irrelevant and can be switched off, because the bounce bob appears on a screen that is entirely black.
- I only used the bounce bob effect for this, because I could not use another sprite slot anymore, because adding a 7th sprite would reduce the maximum allowed file size for all other sprites as well and some of the vital frame animations would exceed this lower maximum.
Misc. ??? Reflection
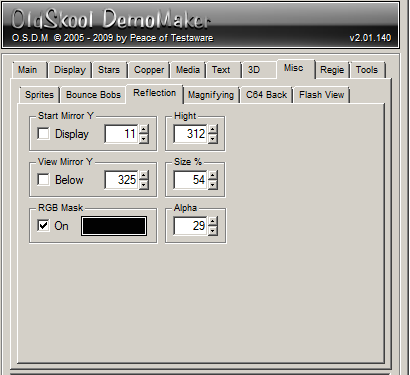 |
|
Reflection Effect Notes
- The Reflection Effect is used for two parts of the demo, 5) Text and Copper and 11) Final Part
Misc. – C64 Back
 |
File: “Data\Copper\Copper_33.PNG”
|

C64 Back Effect Notes:
- I use the C64 Back Effect for most of the transitions between the individual demo parts. See screenshot of a transition further up in this tutorial.
- I call the effect via CAL = C64 (OSDM Script) right before I stop the display at the end of a demo part via STP = DISPLAY and stop it within the next demo part via STP = C64, right before I enable the display again via the CAL = DISPLAY command.
Regie (Direction) ??? Storyboard
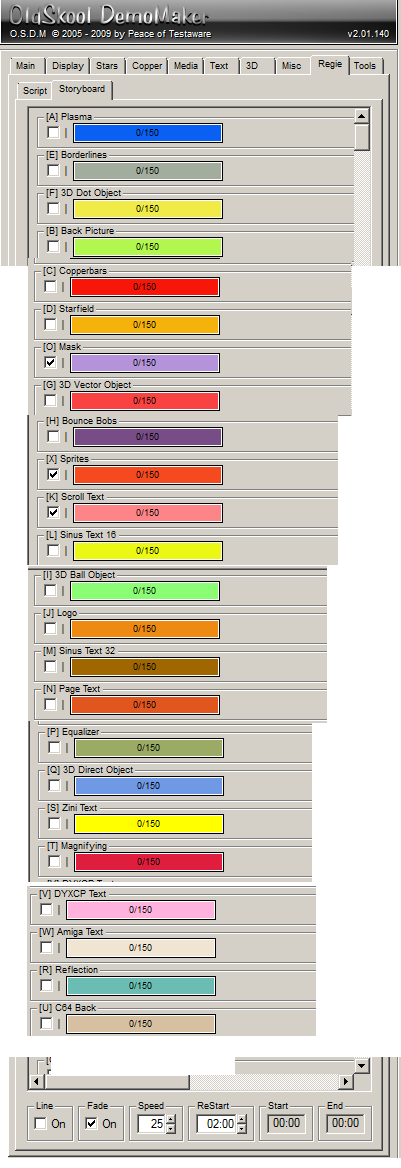 |
Order (Top to Bottom = Back to Front)
List with NOT used Effects removed
|
Storyboard Notes
Start and End of each effect is irrelevant because it is controlled via script. It is also irrelevant if an effect is ???checked??? or not, meaning if the checkbox in front of each effect is enabled or not,
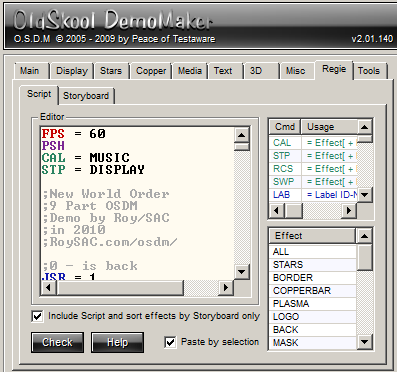
Regie (Direction) ??? Script
 |
|
Script Notes
- The heart and core of the demo where everything comes together. The whole direction of the demo and the separation into its individual parts is controlled via script, also the direction of the individual effects within each part as well as the transition between them is all done via this script.
REP = 52
  ADA = -4
LOP
MVA = 0
NOP = 1
LEA = 3DBALL
IDN = 0
REP = 200
  ADZ = 4
  ADX = 1
  ADY = 1
LOP
REP = 400
  ADZ = -4
  ADX = -1
  ADY = -1
LOP
REP = 200
  ADZ = 4
  ADX = 1
  ADY = 1
LOP
LEA = SPRITE
IDN = 2
REP = 52
  ADA =4
LOP
MVA = 255
NOP = 1
REP = 52
  ADA = -4
LOP
MVA = 0
NOP = 2
CAL = C64
STP = DISPLAY+3DBall
NOP = 1
RTS
;------------------
;Mouse
LAB = 3
;Initialize
LEA = SPRITE
IDN = 0
MVA = 0
IDN = 4
MVA = 0
MVZ = 0
MVX = 320
MVY = 240
IDN = 5
MVA = 0
IDN = 1
MVA = 0
MVZ = 200
MVX = 320
MVY = 240
NOP = 0
STP = C64
CAL = DISPLAY
;Fade+Zoom-In Logo
IDN = 4
REP = 100
  ADA = 1
  ADZ = 1
LOP
REP = 50
  IDN = 4
  ADA = 3
LOP
IDN = 4
MVA = 254
IDN = 5
MVA = 254
;Play Anim
;and Switch Off
IDN = 1
REP = 20
  ADA = 5
  ADZ = 5
LOP
MVA = 254
NOP = 2
IDN = 5
MVA = 0
;Fade+Zoom Out Logo
REP = 253
  IDN = 4
  ADA = -1
  ADZ = 1
  IDN = 1
  ADA = -1
  ADZ = 2
LOP
CAL = C64
STP = DISPLAY
NOP = 1
IDN = 4
MVA = 0
IDN = 1
MVA = 0
RTS
;-----------------
LAB = 4
;3D Vector Star
;outx5.vobj
;z-rotate 16
CAL = 3DVECTOR
LEA = 3DVECTOR
IDN = 0
;MVX = -640
;MVY = -320
MVX = 0
MVY = 0
MVZ = 1000
OSX = -100
OSY = 0
OSZ = 0
MVS = 30
OSX = 0
STP = C64
CAL = DISPLAY
NOP = 9
CAL = C64
STP = DISPLAY
NOP = 1
STP = 3DVector
STP = C64
OSY = 0
OSX = 0
OSZ = 0
NOP = 0
RTS
;-------------------
;Amiga
LAB = 5
CAL = MASK
LEA = MASK
MVA = 100
CAL = REFLECTION+STARS
CAL = COPPERBAR
TRS
CAL = DISPLAY
NOP = 1
CAL = AMIGATEXT
LEA = AMIGATEXT
MVC = -2
REP = 100
  JSR = 16
LOP
TIM = 22
CAL = C64
STP = DISPLAY
NOP = 1
STP = C64
STP = AMIGATEXT+STARS
STP = COPPERBAR
STP = REFLECTION
LEA = MASK
MVA = 30
STP = MASK
NOP = 0
RTS
;----------------------
LAB = 6
LEA = AMIGATEXT
REP = 6
  ADC = 1
LOP
REP = 6
  ADC = -1
LOP
NOP = 0
RTS
;-----------------
;3DBall 2
LAB = 7
CAL = STARS+PLASMA
CAL = 3DBALL
LEA = 3DBALL
IDN = 1
OSZ = -100
;OSX = 100
;OSY = 100
MVZ = 1900
;MVX = -600
;MVY = -400
MVX = 0
MVY = 0
CPW = 100
CPZ = 20
NOP = 0
CAL = DISPLAY
LEA = 3DBALL
IDN = 1
REP = 300
  ADZ = -6
LOP
REP = 250
  ADZ = 4
LOP
REP = 250
  ADZ = -3
LOP
REP = 250
  ADX = -1
  ADZ = 2
LOP
REP = 350
  ADX = 2
  ADZ = 2
LOP
CAL = C64
STP = DISPLAY
NOP = 1
STP = C64
OSZ = 0
OSX = 0
OSY = 0
STP = 3DBALL
STP = STARS+PLASMA
RTS
;-----------------
;Scroll
LAB = 8
TRS
CAL = STARS
CAL = PLASMA
CAL = SCROLL
LEA = SCROLL
IDN = 7
MVS = 0
CAL = DISPLAY
NOP = 1
TIM = 17
CAL = C64
STP = DISPLAY
NOP = 1
STP = C64
STP = SCROLL
STP = PLASMA+STARS
NOP = 0
RTS
;----------------
;Vect Spaceship
LAB = 9
CAL = 3DVECTOR
LEA = 3DVECTOR
IDN = 1
;MVX = -700
;MVY = -300
MVX = -100
MVY = 0
MVZ = 1200
NOP = 0
CAL = STARS+PLASMA
CAL = DISPLAY
NOP = 1
NOP = 8
CAL = C64
STP = DISPLAY
NOP = 1
STP = C64
STP = 3DVECTOR
STP = STARS+PLASMA
NOP = 0
RTS
;-----------------
;Mask and Credits
LAB = 10
TRS
CAL = MASK
CAL = DISPLAY
NOP = 1
NOP = 2
STP = DISPLAY
NOP = 1
CAL = BACK
CAL = DISPLAY
CAL = PAGE
TIM = 52
CAL = C64
STP = DISPLAY
NOP = 1
STP = C64+PAGE
STP = BACK+MASK
RTS
;----------------
;End
LAB = 11
  CAL = SINUS16
  LEA = SINUS16
  MVS = 10
  NOP = 1
  MVS = 4
  CAL = DISPLAY
  CAL = LOGO+STARS
  CAL = SINUS32
  CAL = REFLECTION
  NOP = 3
  JSR = 12
RTS
;-----------------
LAB = 12
;Quit Demo
CAL = SCROLL
LEA = SCROLL
IDN = 7
MVS = 0
NOP = 1
MVS = -1
RTS
| Script Code | (continued 1) | (continued 2) | (continued 3) |
PSH CAL = MUSIC STP = DISPLAY ;New World Order ;11 Part OSDM ;Demo by Roy/SAC ;in 2010 ;RoySAC.com/osdm/ ;0 - is back JSR = 1 ;1 - 3DBalls JSR = 2 ;2 - Mouse JSR = 3 ;3 - Vector Stars JSR = 4 ;4 - Amiga ;plus 6 ;(subroutine for Amiga) JSR = 5 ;5 - Balls 2 JSR = 7 ;6 - Scroll JSR = 8 ;7 - 3DVect Ship JSR = 9 ;8 - Mask and Credits JSR = 10 ;9 - End ;Plus 12 for Quit Demo JSR = 11 End ;----------------- ;Is Back LAB = 1 CAL = BOUNCE+DISPLAY NOP = 1 CAL = C64 STP = DISPLAY NOP = 1 STP = C64+BOUNCE RTS ;------------------- ;3DBall ;roy23b - Copy.obj LAB = 2 CAL = SPRITE LEA = SPRITE IDN = 1 MVA = 0 MVX = 320 MVY = 240 IDN = 2 MVA = 0 IDN = 3 MVA = 0 IDN = 4 MVA = 0 IDN = 0 MVX = 320 MVY = 240 CAL = 3DBALL LEA = 3DBALL IDN = 0 ;MVX = -500 ;MVY = -240 MVX = 0 MVY = 0 MVZ = 700 NOP = 0 CAL = DISPLAY LEA = SPRITE IDN = 0 REP = 40 ADA = 2 ADZ = 5 LOP NOP = 1 LEA = 3DBALL IDN = 0 REP = 200 ADZ = 4 ADX = -1 ADY = 1 LOP REP = 400 ADZ = -4 ADX = 1 ADY = -1 LOP REP = 200 ADZ = 4 ADX = -1 ADY = 1 LOP LEA = SPRITE IDN = 3 REP = 52 ADA = 4 LOP MVA = 255 NOP = 1 |
REP = 52 ADA = -4 LOP MVA = 0 NOP = 1 LEA = 3DBALL IDN = 0 REP = 200 ADZ = 4 ADX = 1 ADY = 1 LOP REP = 400 ADZ = -4 ADX = -1 ADY = -1 LOP REP = 200 ADZ = 4 ADX = 1 ADY = 1 LOP LEA = SPRITE IDN = 2 REP = 52 ADA =4 LOP MVA = 255 NOP = 1 REP = 52 ADA = -4 LOP MVA = 0 NOP = 2 CAL = C64 STP = DISPLAY+3DBall NOP = 1 RTS ;------------------ ;Mouse LAB = 3 ;Initialize LEA = SPRITE IDN = 0 MVA = 0 IDN = 4 MVA = 0 MVZ = 0 MVX = 320 MVY = 240 IDN = 5 MVA = 0 IDN = 1 MVA = 0 MVZ = 200 MVX = 320 MVY = 240 NOP = 0 STP = C64 CAL = DISPLAY ;Fade+Zoom-In Logo IDN = 4 REP = 100 ADA = 1 ADZ = 1 LOP REP = 50 IDN = 4 ADA = 3 LOP IDN = 4 MVA = 254 IDN = 5 MVA = 254 ;Play Anim ;and Switch Off IDN = 1 REP = 20 ADA = 5 ADZ = 5 LOP MVA = 254 NOP = 2 IDN = 5 MVA = 0 ;Fade+Zoom Out Logo REP = 253 IDN = 4 ADA = -1 ADZ = 1 IDN = 1 ADA = -1 ADZ = 2 LOP CAL = C64 STP = DISPLAY NOP = 1 IDN = 4 MVA = 0 IDN = 1 MVA = 0 RTS ;----------------- |
LAB = 4 ;3D Vector Star ;outx5.vobj ;z-rotate 16 CAL = 3DVECTOR LEA = 3DVECTOR IDN = 0 ;MVX = -640 ;MVY = -320 MVX = 0 MVY = 0 MVZ = 1000 OSX = -100 OSY = 0 OSZ = 0 MVS = 30 OSX = 0 STP = C64 CAL = DISPLAY NOP = 9 CAL = C64 STP = DISPLAY NOP = 1 STP = 3DVector STP = C64 OSY = 0 OSX = 0 OSZ = 0 NOP = 0 RTS ;------------------- ;Amiga LAB = 5 CAL = MASK LEA = MASK MVA = 100 CAL = REFLECTION+STARS CAL = COPPERBAR TRS CAL = DISPLAY NOP = 1 CAL = AMIGATEXT LEA = AMIGATEXT MVC = -2 REP = 100 JSR = 16 LOP TIM = 22 CAL = C64 STP = DISPLAY NOP = 1 STP = C64 STP = AMIGATEXT+STARS STP = COPPERBAR STP = REFLECTION LEA = MASK MVA = 30 STP = MASK NOP = 0 RTS ;---------------------- LAB = 6 LEA = AMIGATEXT REP = 6 ADC = 1 LOP REP = 6 ADC = -1 LOP NOP = 0 RTS ;----------------- ;3DBall 2 LAB = 7 CAL = STARS+PLASMA CAL = 3DBALL LEA = 3DBALL IDN = 1 OSZ = -100 ;OSX = 100 ;OSY = 100 MVZ = 1900 ;MVX = -600 ;MVY = -400 MVX = 0 MVY = 0 CPW = 100 CPZ = 20 NOP = 0 CAL = DISPLAY LEA = 3DBALL IDN = 1 REP = 300 ADZ = -6 LOP REP = 250 ADZ = 4 LOP REP = 250 ADZ = -3 LOP REP = 250 ADX = -1 ADZ = 2 LOP |
REP = 350 ADX = 2 ADZ = 2 LOP CAL = C64 STP = DISPLAY NOP = 1 STP = C64 OSZ = 0 OSX = 0 OSY = 0 STP = 3DBALL STP = STARS+PLASMA RTS ;----------------- ;Scroll LAB = 8 TRS CAL = STARS CAL = PLASMA CAL = SCROLL LEA = SCROLL IDN = 7 MVS = 0 CAL = DISPLAY NOP = 1 TIM = 17 CAL = C64 STP = DISPLAY NOP = 1 STP = C64 STP = SCROLL STP = PLASMA+STARS NOP = 0 RTS ;---------------- ;Vect Spaceship LAB = 9 CAL = 3DVECTOR LEA = 3DVECTOR IDN = 1 ;MVX = -700 ;MVY = -300 MVX = -100 MVY = 0 MVZ = 1200 NOP = 0 CAL = STARS+PLASMA CAL = DISPLAY NOP = 1 NOP = 8 CAL = C64 STP = DISPLAY NOP = 1 STP = C64 STP = 3DVECTOR STP = STARS+PLASMA NOP = 0 RTS ;----------------- ;Mask and Credits LAB = 10 TRS CAL = MASK CAL = DISPLAY NOP = 1 NOP = 2 STP = DISPLAY NOP = 1 CAL = BACK CAL = DISPLAY CAL = PAGE TIM = 52 CAL = C64 STP = DISPLAY NOP = 1 STP = C64+PAGE STP = BACK+MASK RTS ;---------------- ;End LAB = 11 CAL = SINUS16 LEA = SINUS16 MVS = 10 NOP = 1 MVS = 4 CAL = DISPLAY CAL = LOGO+STARS CAL = SINUS32 CAL = REFLECTION NOP = 3 JSR = 12 RTS ;----------------- LAB = 12 ;Quit Demo CAL = SCROLL LEA = SCROLL IDN = 7 MVS = 0 NOP = 1 MVS = -1 RTS |
Tools ??? Export
- Export Icon: Enabled
File: “Data\Misc\RoySAC.ico”
(NWOMiscIco.zip (625 Bytes))
- Start Screen Picture: Enabled
File: “Data\Logos\Roysacny2010-loading.png”

 |
EXTRAS
- NWO Tutorial Resources
 NWO TUt.zip NWO (4.9 MB)
 - This Tutorial in PDF Format
 OSDM_Demo_Tutorial-New_World_Order-by_Roy-SAC.pdf (1.7 MB)
Watch Video Capture
[vimeo:http://www.vimeo.com/9248008]
Cheers!
Carsten aka Roy/SAC


Talking about a tutorial, simply GREAT. Must have took you a lot of time to write it, so I would like to thank you for the work you did!
[…] OSDM Demo Tutorial ??? New World Order […]